Ongles en gel
Foires aux questions
Rencontrez-vous des difficultés avec la tenue de vos bandes de gel ? Voici quelques conseils pour garantir une meilleure adhérence de vos bandes de gel.
BASE
De quoi sont faites les bandes de gel ?
Les bandes de gel pour ongles NailsArt Studio sont composées d'un vernis en gel semi-durci qui a été partiellement durci pendant la production afin qu'il puisse être facilement appliqué comme un autocollant.
Quelle est leur durée de vie ?
Les bandes de gel pour ongles de NailsArt Studio offrent une tenue durable, jusqu'à 3 semaines !
Peuvent-ils endommager mes ongles ?
Non, en suivant correctement les instructions d'application et de retrait, l'utilisation des bandes de gel NailsArt Studio ne présente pas de risque. Elles peuvent même aider les ongles cassants et mous en les protégeant contre l'usure quotidienne, favorisant ainsi leur croissance.
Toutefois, il est conseillé de ne pas les utiliser si vous avez eu une réaction à un test épicutané, si votre peau est irritée ou en présence de plaies sur les mains.
Quelle est la différence entre un vernis à ongles ordinaire et un vernis à ongles en gel ?
Les vernis à ongles ordinaires sont faits de vernis ordinaire, d'acrylique, de vynil ou même de papier, tandis que les bandes de gel NailsArt sont faites de vrai vernis à ongles. Elles durent plus longtemps et doivent être séchées à l'aide d'une lampe UV pour compléter le processus.
Puis-je les réutiliser ?
Non. Une fois que les bandes de gel pour ongles ont été retirées après avoir été durcies sur l'ongle, elles perdent leur propriété collante, ce qui signifie qu'il n'est pas possible de les réappliquer.
Comment dois-je conserver les bandes restantes ?
Une fois que vous avez ouvert vos bandes de gel NailsArt Studio, conservez-les dans leur pochette protectrice et de préférence dans leur boîte, dans un endroit frais et sec, à l'abri de la lumière du soleil.
PRÉPARER ET APPLIQUER CORRECTEMENT
Comment préparer mes ongles avant la pose des bandes de gel ?
★ Se laver les mains avec du savon
★ Assurez-vous que vos cuticules sont repoussées vers l'arrière.
★ Essuyez vos ongles avec de l'acétone pour enlever toute trace d'huile et laissez-les sécher.
Comment dois-je les appliquer ?
★Veillez à effectuer la routine de préparation (mentionnée ci-dessus) avant de procéder aux étapes d'application.
1) Ouvrez vos bandes de gel pour ongles NailsArt et retirez le contenu.
2) Choisissez la bonne taille pour chacun de vos ongles et la forme de vos cuticules.
3) Retirez le film transparent qui protège la bande de gel que vous souhaitez appliquer.
4) Soulevez délicatement la bande de gel du film.
5) Placez le bord de la bande de gel près de la cuticule, mais pas sur la cuticule ★ Pour un ajustement parfait, vous pouvez étirer doucement les bords des bandes de gel.
6) Appuyez fermement sur l'ongle pour éliminer les bulles d'air et les plis. Utilisez le bâtonnet en bois pour lisser une nouvelle fois la bande de gel le long des bords et des côtés de l'ongle.
7) Coupez l'excédent de la bande à l'aide de ciseaux ou d'un coupe-ongles.
8) Limez doucement vos ongles pour lisser la pointe avant la polymérisation.
9) Veillez à ce que les bandes ne dépassent pas la longueur de l'ongle.
10) Utilisez une lampe UV/LED pour faire durcir les bandes 60 secondes. Répétez jusqu'à 3 fois si nécessaire, jusqu'à durcissement complet.
11) Limez une dernière fois l'excès de bandes de gel pour une finition lisse.
12) Pour plus de brillance, appliquez un top coat en gel.
13) Gardez vos ongles à l'écart de tout liquide pendant 1 heure après l'application afin d'assurer un processus de durcissement correct.
Combien de temps faut-il pour les appliquer ?
Vous pouvez appliquer les bandes de gel NailsArt en quelques secondes ! Après l'application initiale, vous devrez les durcir avec une lampe UV/LED pendant environ 60 secondes.
Puis-je les appliquer sur les tips/gel/acrylique/dip ?
Oui, c'est possible !
Ai-je besoin d'une base ou d'un top coat ?
Vous n'avez pas besoin de base avant d'appliquer les bandes de gel. Vous pouvez utiliser un top coat pour donner plus de brillance à votre manucure et la faire durer encore plus longtemps !
La lumière du soleil peut-elle durcir les bandes de gel comme le font les lampes UV ?
Oui. Si le soleil est présent et que vous ne voulez pas utiliser de lampe UV, vous pouvez vous exposer au soleil pendant 5 à 10 minutes, et vos ongles seront complètement durcis.
La taille des bandes est-elle si importante si je peux les étirer pour qu'elles s'adaptent à mes ongles ?
La meilleure pratique consiste à choisir soigneusement des bandes dont la taille correspond parfaitement à la largeur de vos ongles et à s'assurer qu'elles ne touchent pas vos cuticules ou votre peau. Le fait d'étirer les bandes dans le sens de la longueur ou de la largeur peut déformer le dessin qui y figure.
J'en ai appliqué un mais il se détache sur les bords et ne colle pas. Que dois-je faire ?
Retirez la bande et veillez à nettoyer l'ongle de toute cuticule, résidu ou huile.
Choisissez la bonne taille de bande (qui ne doit pas toucher la peau) et réappliquez-la.
Veillez à éviter tout contact avec l'eau pendant 1 heure après le durcissement.
Dois-je avoir des compétences en nailtech pour réussir à les appliquer ?
Non, avec les bandes de gel NailsArt, vous pouvez obtenir des ongles d'aspect professionnel sans vous rendre dans un salon de manucure ou passer des heures à dessiner vos ongles. Le processus d'application est très facile, car les bandes s'appliquent comme des autocollants.
Puis-je les limer une fois qu'elles ont durci ?
Oui, vous pouvez limer l'excès une dernière fois pour une finition lisse !
Quelle est la meilleure façon de couper l'excédent ?
Vous pouvez utiliser des ciseaux à ongles ou un coupe-ongles pour couper l'excédent initial une fois que vous avez placé et lissé la bande. Ensuite, il est recommandé de limer l'excédent restant pour lisser le bord de l'ongle. Cette dernière étape peut être réalisée avant ou après la polymérisation des bandes de gel !
Comment les retirer ?
1) Soulevez délicatement la bande de gel d'un côté ou de l'autre à l'aide du bâtonnet de bois.
2) Imbibez le bâtonnet de bois de dissolvant pour vernis à ongles et déposez-en quelques gouttes entre la bande et l'ongle.
Cela permettra de dissoudre le matériau adhésif qui colle la bande de gel à l'ongle.
3) Glissez délicatement un bâtonnet de bois imbibé de dissolvant sous la bande de gel, allant d'avant en arrière, et ajoutez plus de dissolvant à la bande si besoin, jusqu'à ce qu'elle se détache complètement et facilement.
4) Soyez patient, évitez de soulever fermement la bande de gel car cela pourrait endommager votre ongle.
5) Nettoyez votre ongle avec du dissolvant pour éliminer toute trace de colle restante sur l'ongle.
D'autres conseils pour que mes ongles durent longtemps ?
Limez les bords de vos ongles de temps en temps pour qu'ils soient toujours lisses et ne se cassent pas.
Veillez à ce que les bandes de gel soient coupées et limées avec précision jusqu'au bord de vos ongles naturels et pas plus, car elles pourraient se décoller plus facilement.
Évitez de vous ronger les ongles ou de jouer avec les bords de vos ongles en permanence.
10 CHOSES À ÉVITER
Évitez l'eau pendant 1 à 2 heures après l'application.
Appliquez-les avant de dormir pour éviter toute exposition à l'eau ou à des activités.
Empêcher l’application sur la peau de la cuticule
L’application près ou sur la peau de la cuticule et sur les bords de l’ongle peut provoquer le soulèvement de la bande de gel sur les côtés et éventuellement sa chute.
Évitez d’appliquer les bandes sur les ongles gras.
Lavez-vous les mains avec du savon et nettoyez vos ongles avec de l'acétone avant d'appliquer le produit. De cette manière, vous êtes sûr que les ongles sont complètement secs.
Ne pas étirer excessivement les bandes de gel.
Bien que les bandes de gel puissent être étirées pour s'adapter correctement aux ongles, un étirement excessif peut déformer leur dessin ou rendre la colle moins efficace.
Le support de l'ongle est irrégulier.
Si c'est le cas, surtout après avoir utilisé une véritable manucure au gel, les ongles peuvent être très abîmés et inégaux. Veillez donc à lisser délicatement l'ongle afin d'en égaliser la surface.
Ne laissez pas les bandes de gel dépasser la longueur de votre ongle naturel.
Veillez à ce que les bandes de gel soient coupées et limées avec précision jusqu'au bord de vos ongles naturels et pas plus, car elles pourraient se décoller plus facilement.
Évitez d'ouvrir l'emballage sous la lumière directe du soleil.
Les bandes de gel deviennent moins extensibles et moins flexibles après avoir été exposées au soleil. Le durcissement des bandes dépend de la durée d'exposition au soleil. Cela peut affecter leur efficacité à adhérer à l'ongle et, par conséquent, leur longévité.
Veillez à appliquer vos bandes de gel à l'intérieur, à l'abri de la lumière directe du soleil.
Ils sont encore mous après le durcissement ? Ils n'ont pas été correctement durcis !
Nous recommandons un temps de durcissement de 1 à 2 minutes à l'aide de notre lampe UV, mais la meilleure façon de savoir si le gel est complètement durci est d'appuyer dessus avec la pointe du bâtonnet à cuticules en bois fourni dans l'emballage. S'il laisse une marque sur les bandes, cela signifie qu'il faut le durcir un peu plus !
Ne pas hydrater les ongles avant l'application.
Vos mains et vos ongles doivent être totalement exempts d'huile et secs.
Évitez de vous ronger les ongles ou de les toucher fréquemment.
Cela contribue certainement à ce que les bandes de gel tombent plus rapidement.
AUTRES
Dois-je jeter les enveloppes qui ne me conviennent pas ?
Ce n'est pas nécessaire ! Les bandes de gel NailsArt peuvent être étirées pour s'adapter à vos ongles !
Mes ongles sont très courts, puis-je couper et utiliser l'autre moitié de la bande plus tard ?
Vous pouvez étirer les bandes de gel dans le sens de la longueur pour les ongles étroits, et dans le sens de la largeur pour les ongles plus larges.
Vous pouvez également couper l'excédent une fois qu'elles ont été appliquées.
Mes ongles sont très courts, puis-je couper et utiliser l'autre moitié de la bande plus tard ?
Oui, les deux côtés des bandes de gel MoYou London peuvent être utilisés, donc si c'est assez long pour vos ongles, n'hésitez pas à le faire ! Nous recommandons de couper les bandes lorsqu'elles sont encore sur le film plastique, afin de conserver la partie restante de la bande avec le film transparent qui la protège de la poussière et des peluches. De plus, si vous souhaitez les utiliser plus tard, remettez-les dans leur pochette protectrice et dans leur boîte.
Traduit avec www.DeepL.com/Translator (version gratuite)
Puis-je les utiliser pour rallonger mes ongles ?
Oui, il est possible de rallonger légèrement vos ongles avec les bandes de gel. Notez cependant que cette technique peut rendre les ongles plus fragiles et susceptibles de se casser.
Puis-je avoir une réaction allergique après l'utilisation des bandes de gel ?
Si vous êtes allergique aux produits en gel classiques, vous pouvez potentiellement avoir une réaction en utilisant les bandes de gel. Nous recommandons de faire un test sur un seul ongle pendant 24 heures avant d'appliquer le set complet.
Peut-on les utiliser en toute sécurité sur les enfants ?
Nous ne recommandons pas l'utilisation de produits en gel nécessitant des lampes UV/LED sur les enfants, car leur peau est plus sensible.
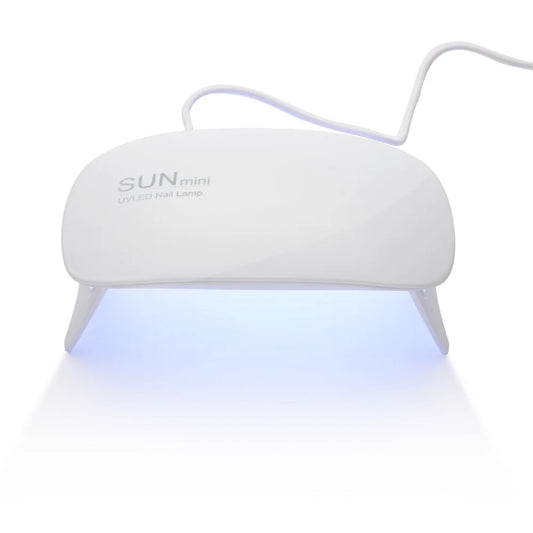
LED/UV Lamp ★ NailsArt studio
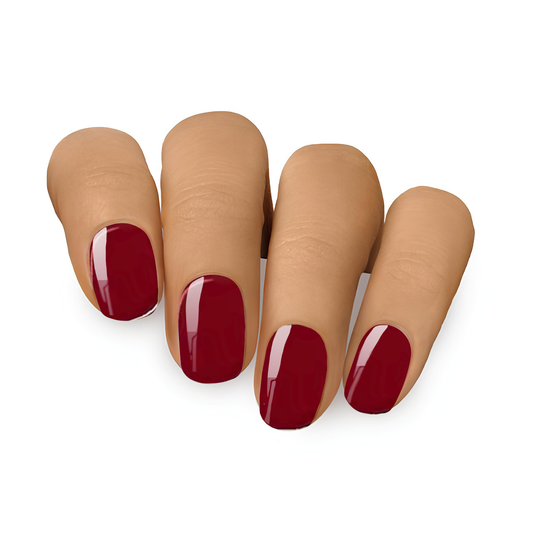
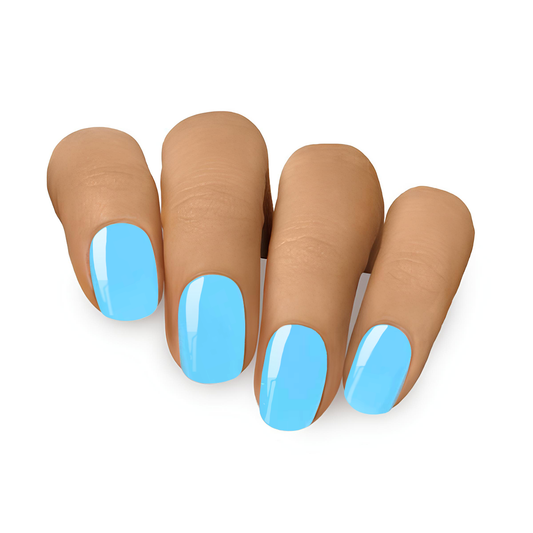
Sparkling Rainbow ★ Semi-Cured Gel Nails
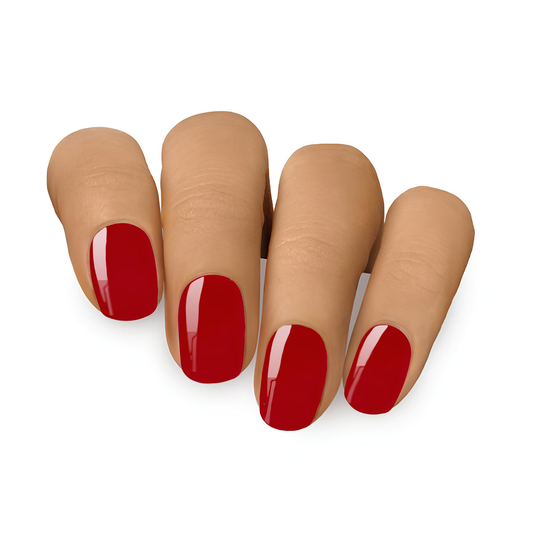
Sparkling Rainbow ★ Semi-Cured Gel Nails

Sparkling Rainbow ★ Semi-Cured Gel Nails
Sparkling Rainbow ★ Semi-Cured Gel Nails
Sparkling Rainbow ★ Semi-Cured Gel Nails
Sparkling Rainbow ★ Semi-Cured Gel Nails